Step 1: Navigate to Custom Vision
- Go to www.customvision.ai and select New Project
- By Resources click the blue create new hyperlink
Step 2: Resource Name
- Name: Choose a unique name for your resource (alphanumeric, no spaces or special characters)
Example: Fruit_Classifier
Step 3: Subscription
- Subscription: Select your active Azure subscription from the dropdown
Step 4: Resource Group
- Resource Group: Select an existing resource group (such as customvision-rg that we made earlier) or click Create new and name it appropriately
Step 5: Service Kind
- Kind: Leave this as CognitiveServices - this is correct for Custom Vision
Step 6: Location
- Location: Choose the region closest to you
Common UK choice: UK South
Step 7: Pricing Tier
- Pricing Tier: Choose S0 (the standard paid tier)
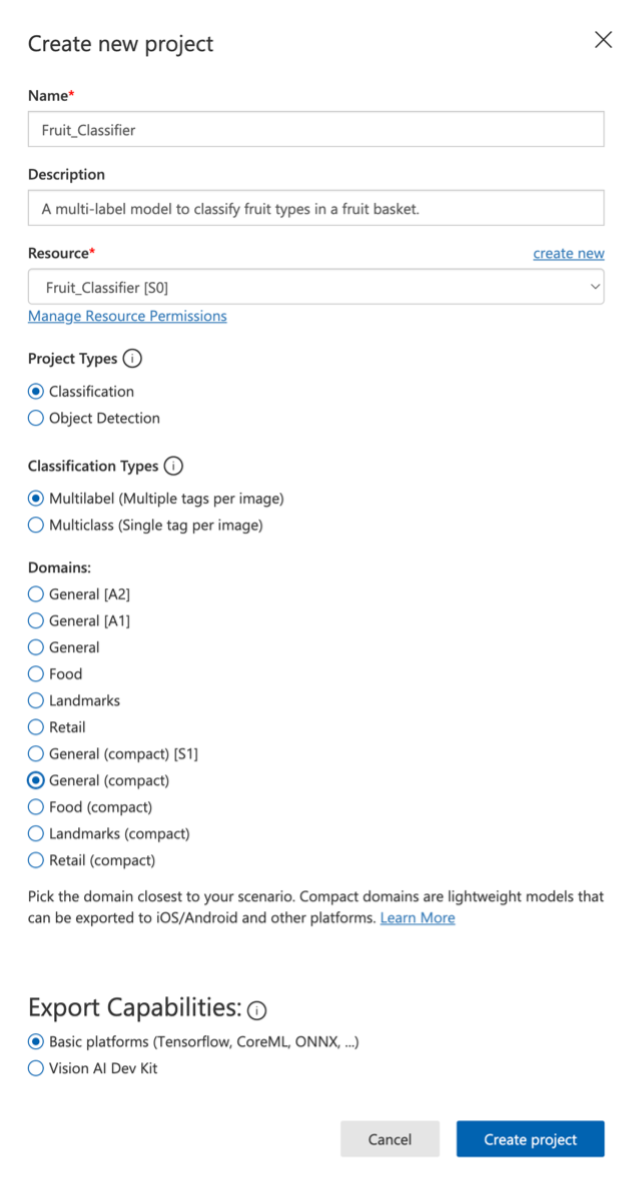
Step 8: Create Project
- Once we have created a new resource, fill out the remainder of the form and click Create Project