Upload and Tag Images Multi-Class
The next step is to upload our training data and begin labelling it.
Step 1: Access the Custom Vision Portal
Go to https://customvision.ai and sign in with the same Azure account.
Click New Project and fill in the project details as follows:
- Name: LymphocyteClassifier
- Description: Optional
- Resource: Select the resource group you created (e.g. LymphocyteClassifier)
- Project Type: Classification
- Classification Type: Multiclass (single tag per image)
- Domain: General (Compact) is fine for now
Click Create Project to proceed.
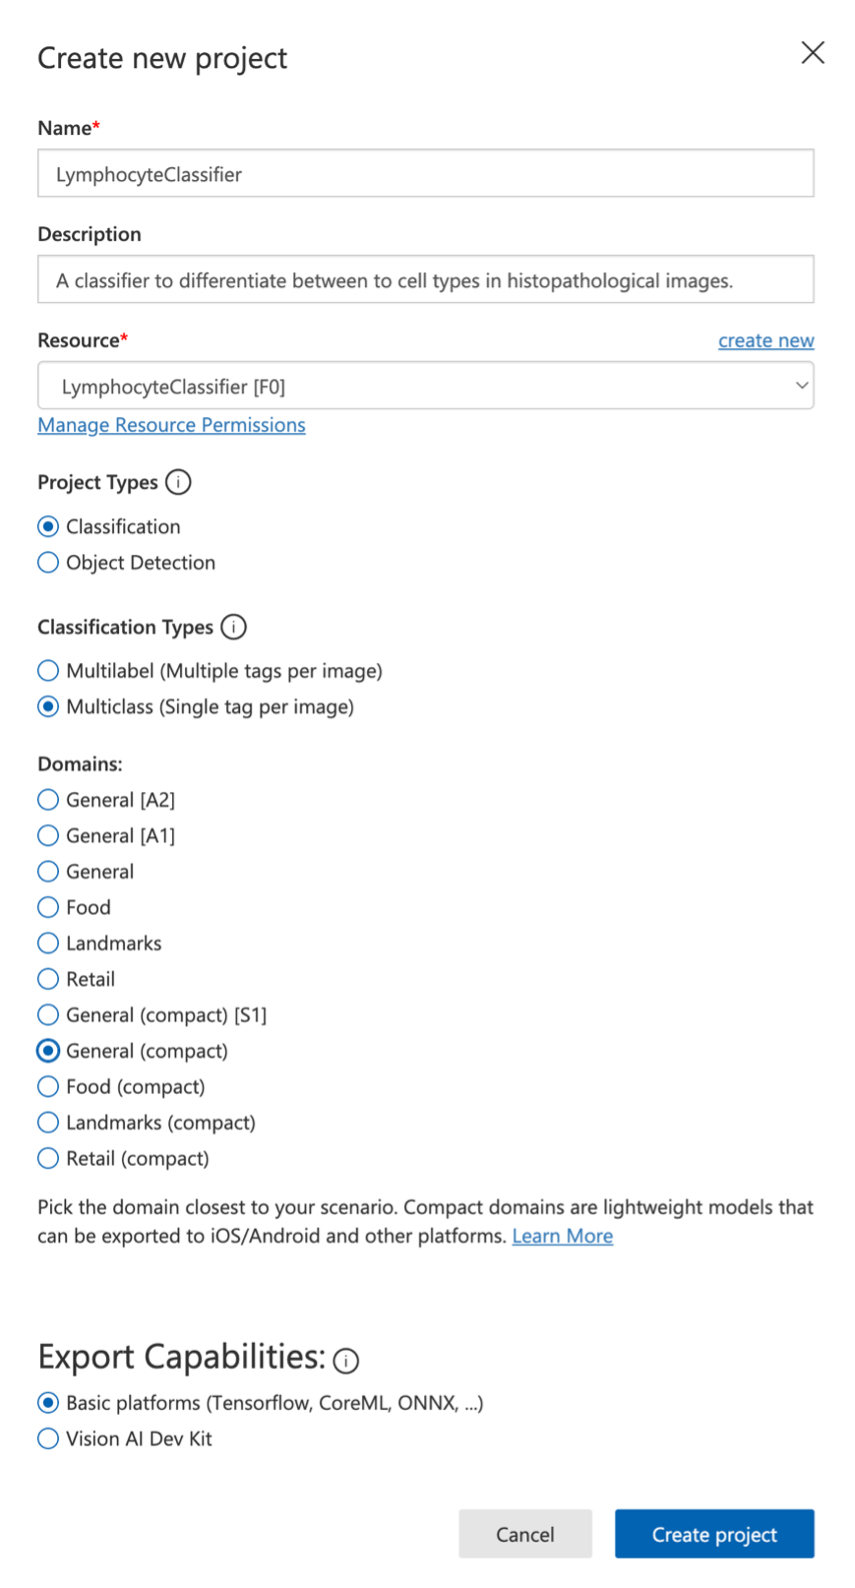
Custom Vision project creation dialog showing all the configuration options for setting up a new multi-class classification project
Step 2: Upload Training Images
In your new project, click Add images.
Select sample images to start with. Open a few at random, and examine them for images that contain mostly cancer cells, and others that contain mostly lymphocytes.
Upload 15 images belonging to each category.
When prompted, apply a tag to each image:
- If the tile shows mostly lymphocytes (small, round, darkly stained cells), use lymphocytes
- If it shows mostly cancer cells (larger, irregular cells with hyperchromatic nuclei), use cancer_cells
The more images you upload, the better your results.