Once your Custom Vision model has been trained, you can quickly assess individual images by following these steps.
Step 1: Access Quick Test
Under the Predictions tab, click Quick Test
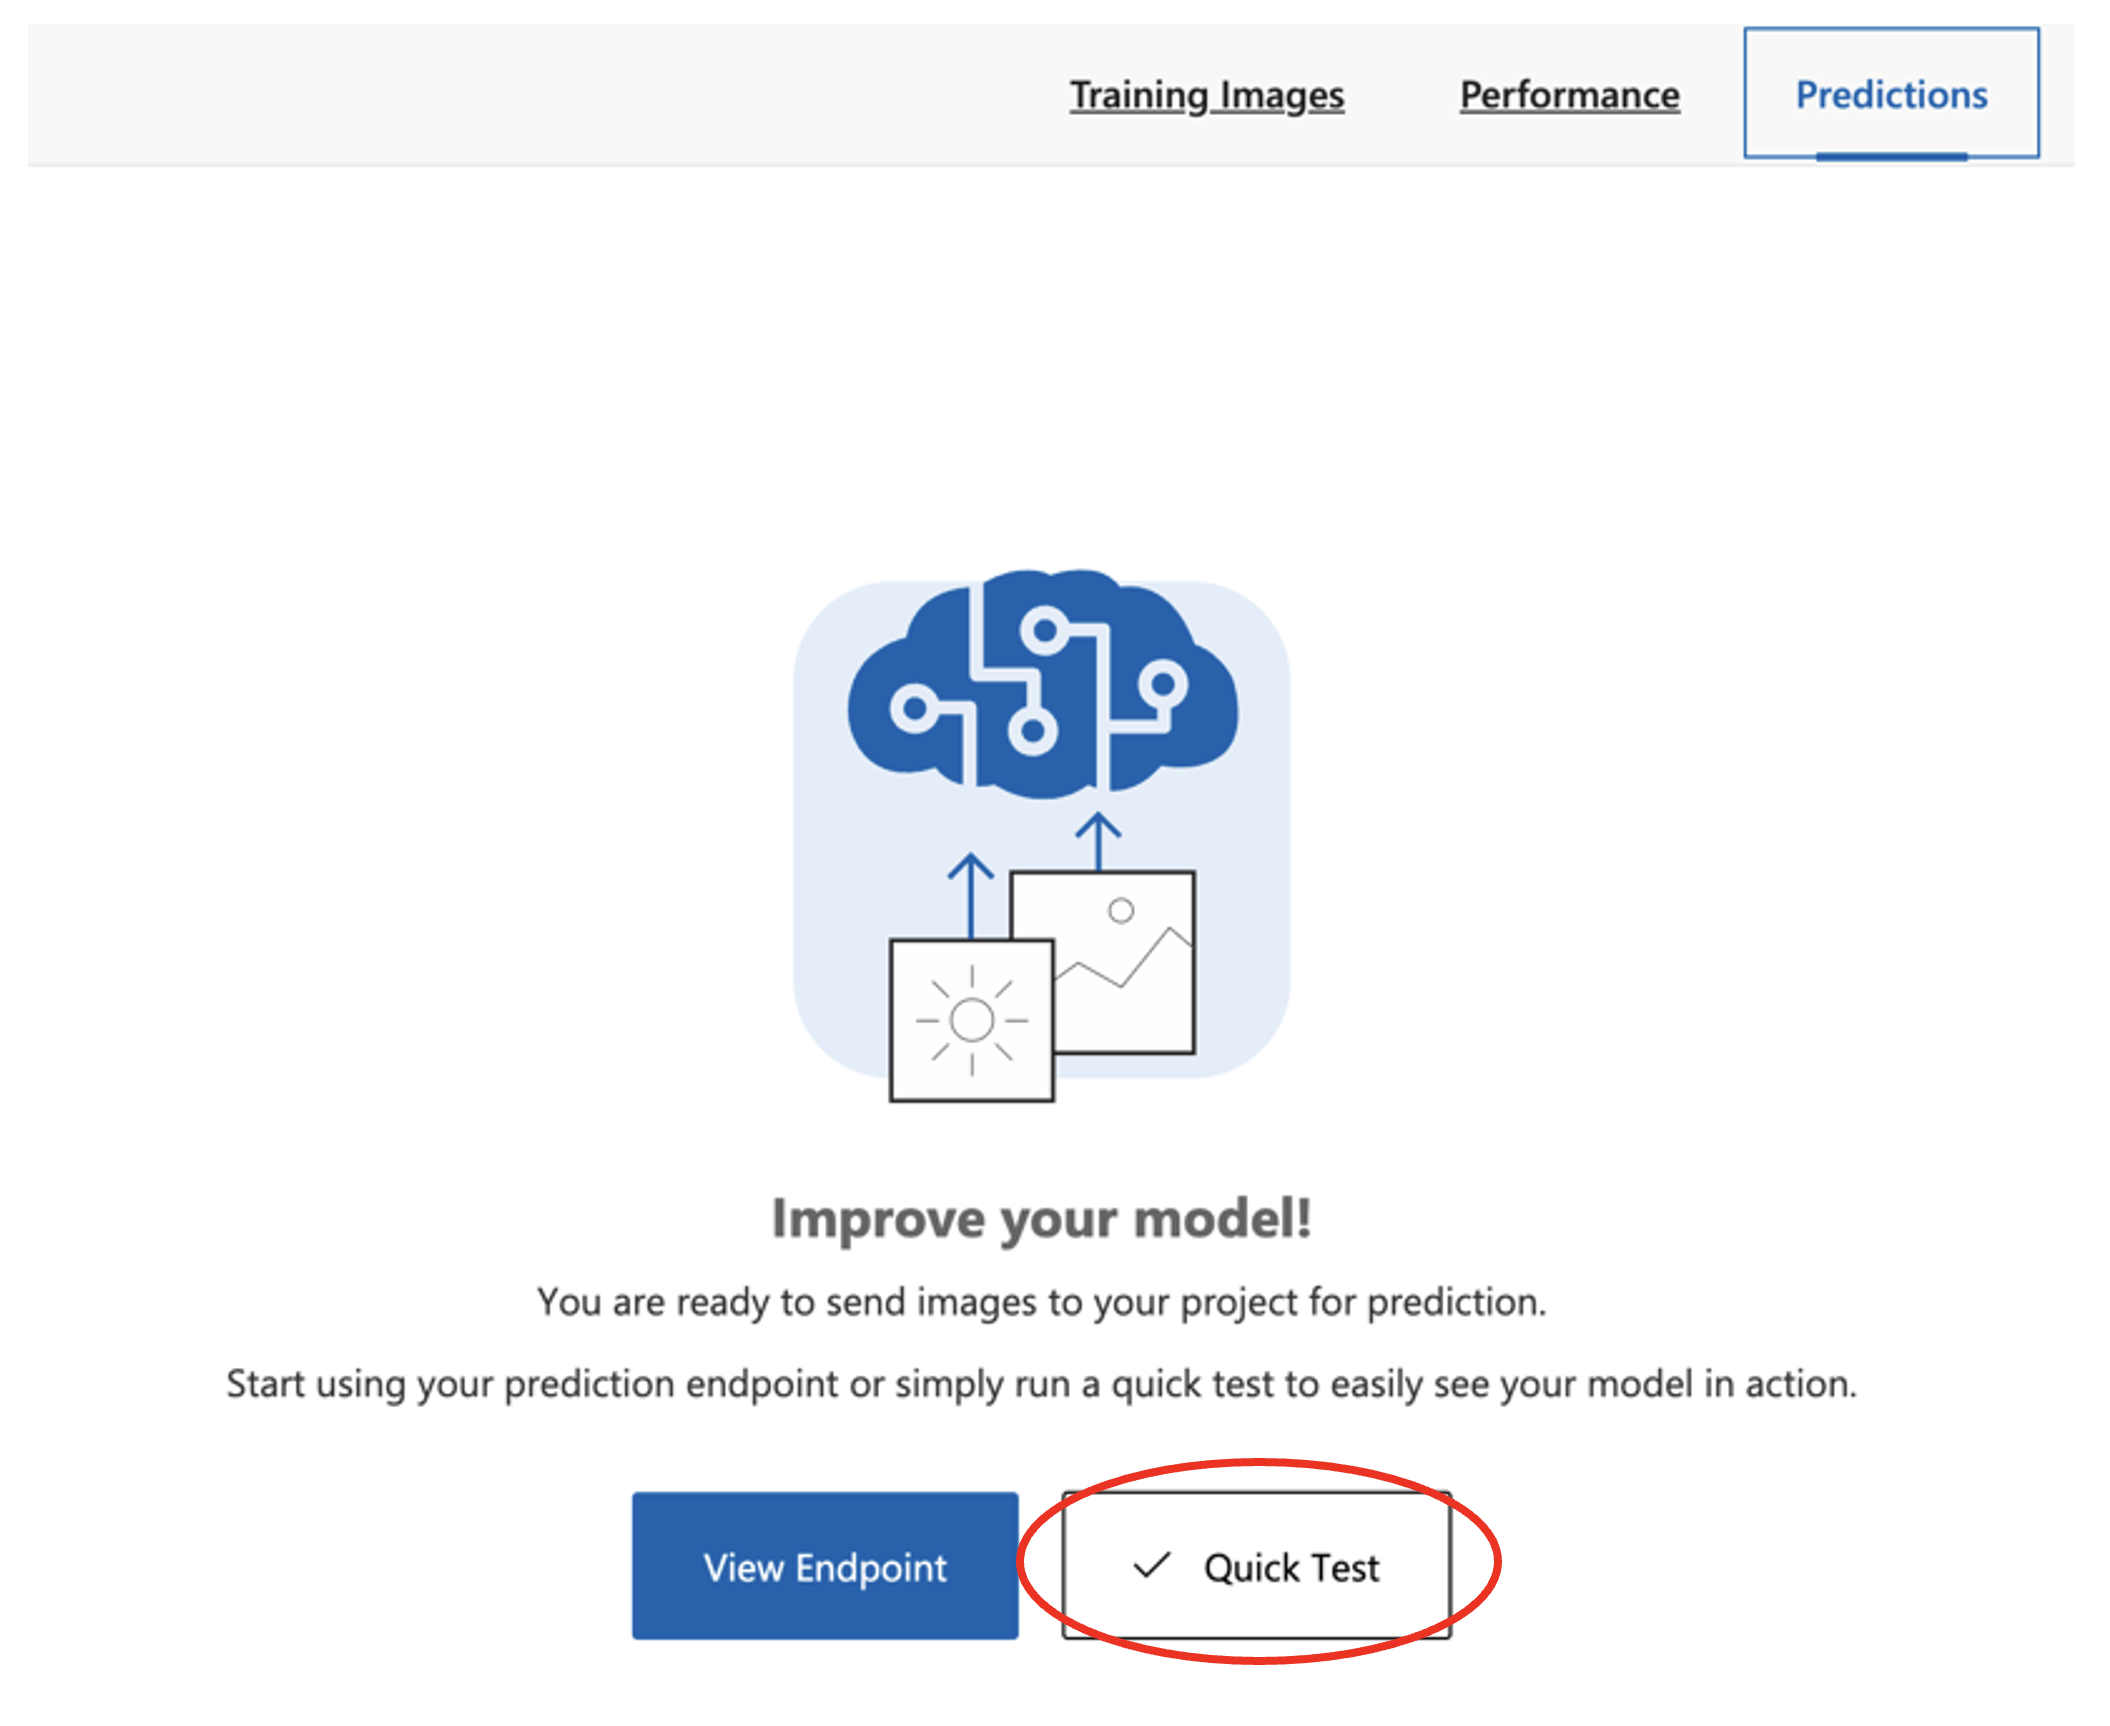
Predictions tab interface with Quick Test button - this allows you to test your trained model with new images
Step 2: Upload Test Image
When prompted, upload a new image to test (one not present in your training set)
Step 3: View Prediction Results
View the prediction: it will return the most likely class (lymphocyte or cancer cell)
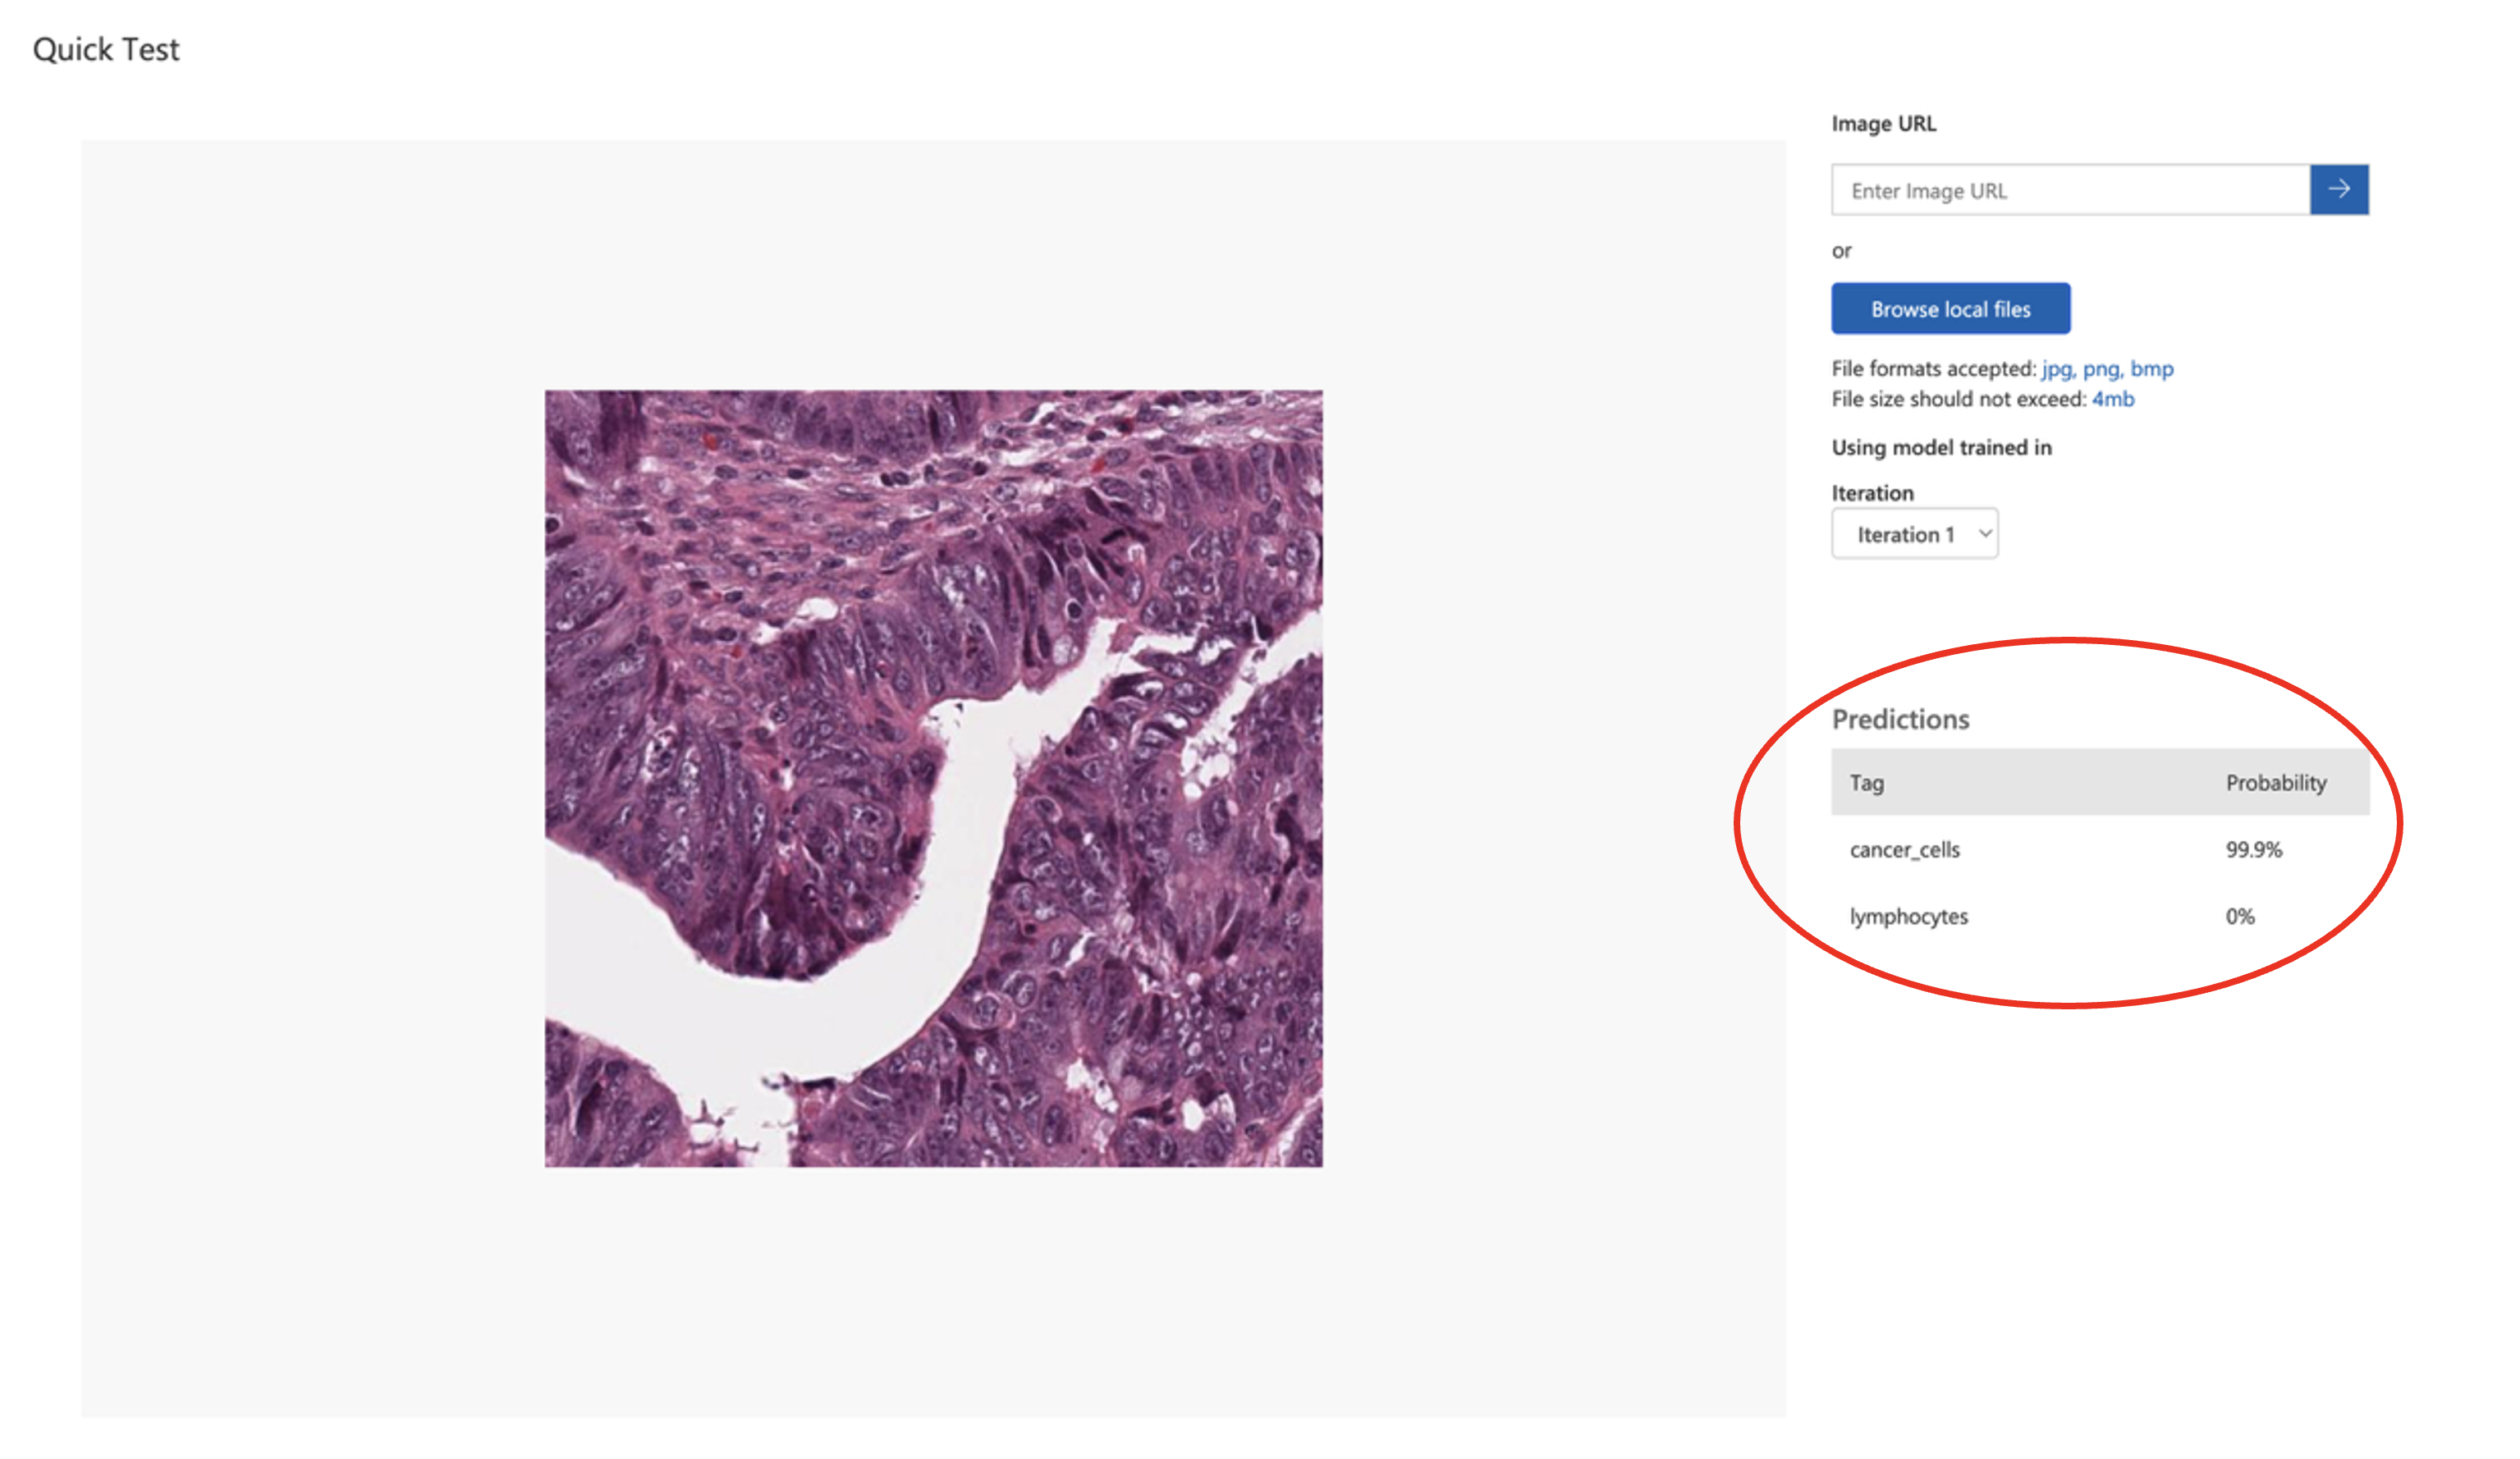
Quick Test results interface displaying a histopathology image with cancer_cells prediction at 99.9% confidence
A description of the assigned tag is given in the bottom right of the window, together with its probability of being correctly predicted.
These results show high confidence predictions from the model, but high confidence doesn't necessarily mean the predictions are accurate. Small, clean datasets like this one can lead to overfitting, where the model becomes overconfident on new data. We'll revisit this later when we discuss dataset size, variability and overfitting.