Custom Vision

Wildlife Classification in Azure ML Studio AI Vision

Follow these steps to set up your environment for wildlife classification using Custom Vision and Azure ML Studio.

Step 1: Set Up Azure ML Studio

Go to https://ml.azure.com/ and sign in with your Azure account.

Select your subscription and workspace. If you haven't created a workspace, make one now.

Once you're inside your workspace, click on Notebooks on the leftmost panel.

Click the + Files button, and Upload files, and upload your notebook file from the following filepath in the scryptIQ GitHub repository:

ai_services/wildlife_classification.ipynb

Create a standard notebook compute instance. In the leftmost sidebar, scroll down and click Compute under the 'Manage' heading. Click the blue + New button.

Fill out the name (e.g., wildlife-custom-vision). Select CPU and the Standard_DS3_v2 option.

Click Review + Create, and Create again. Allow a few minutes for Azure to provision your Compute.

Once your compute has started, select the Azure ML kernel from the dropdown menu in the upper right corner of the screen.

Step 2: Create Custom Vision Resources

In the Azure Portal (https://portal.azure.com):

  • Click "Create a resource" (+ icon)
Azure portal showing the Create a resource button

Azure portal showing the Create a resource button

Search for "Custom Vision" and select it.

Click "Create".

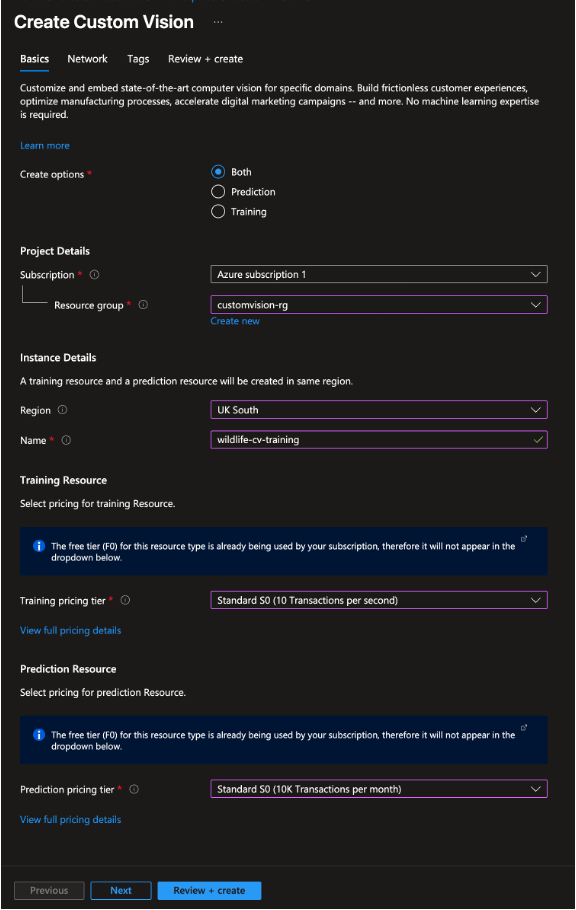
Configure Resources

  • Subscription: Select your Azure subscription
  • Resource Group: Choose existing or create new (e.g., wildlife-cv-rg)
  • Instance Name: wildlife-cv-training
  • Instance Region: Choose a region (e.g., East US, West Europe)
  • Training Pricing: F0 (Free) or Standard (S0)
  • Prediction Pricing: F0 (Free) or Standard (S0)

Click "Review + create", then "Create".

Custom Vision resource creation form showing configuration options

Step 3: Get Your Credentials

Training Credentials:

On the Azure Portal go to Resources and find your training resource (select your wildlifecvtraining instance).

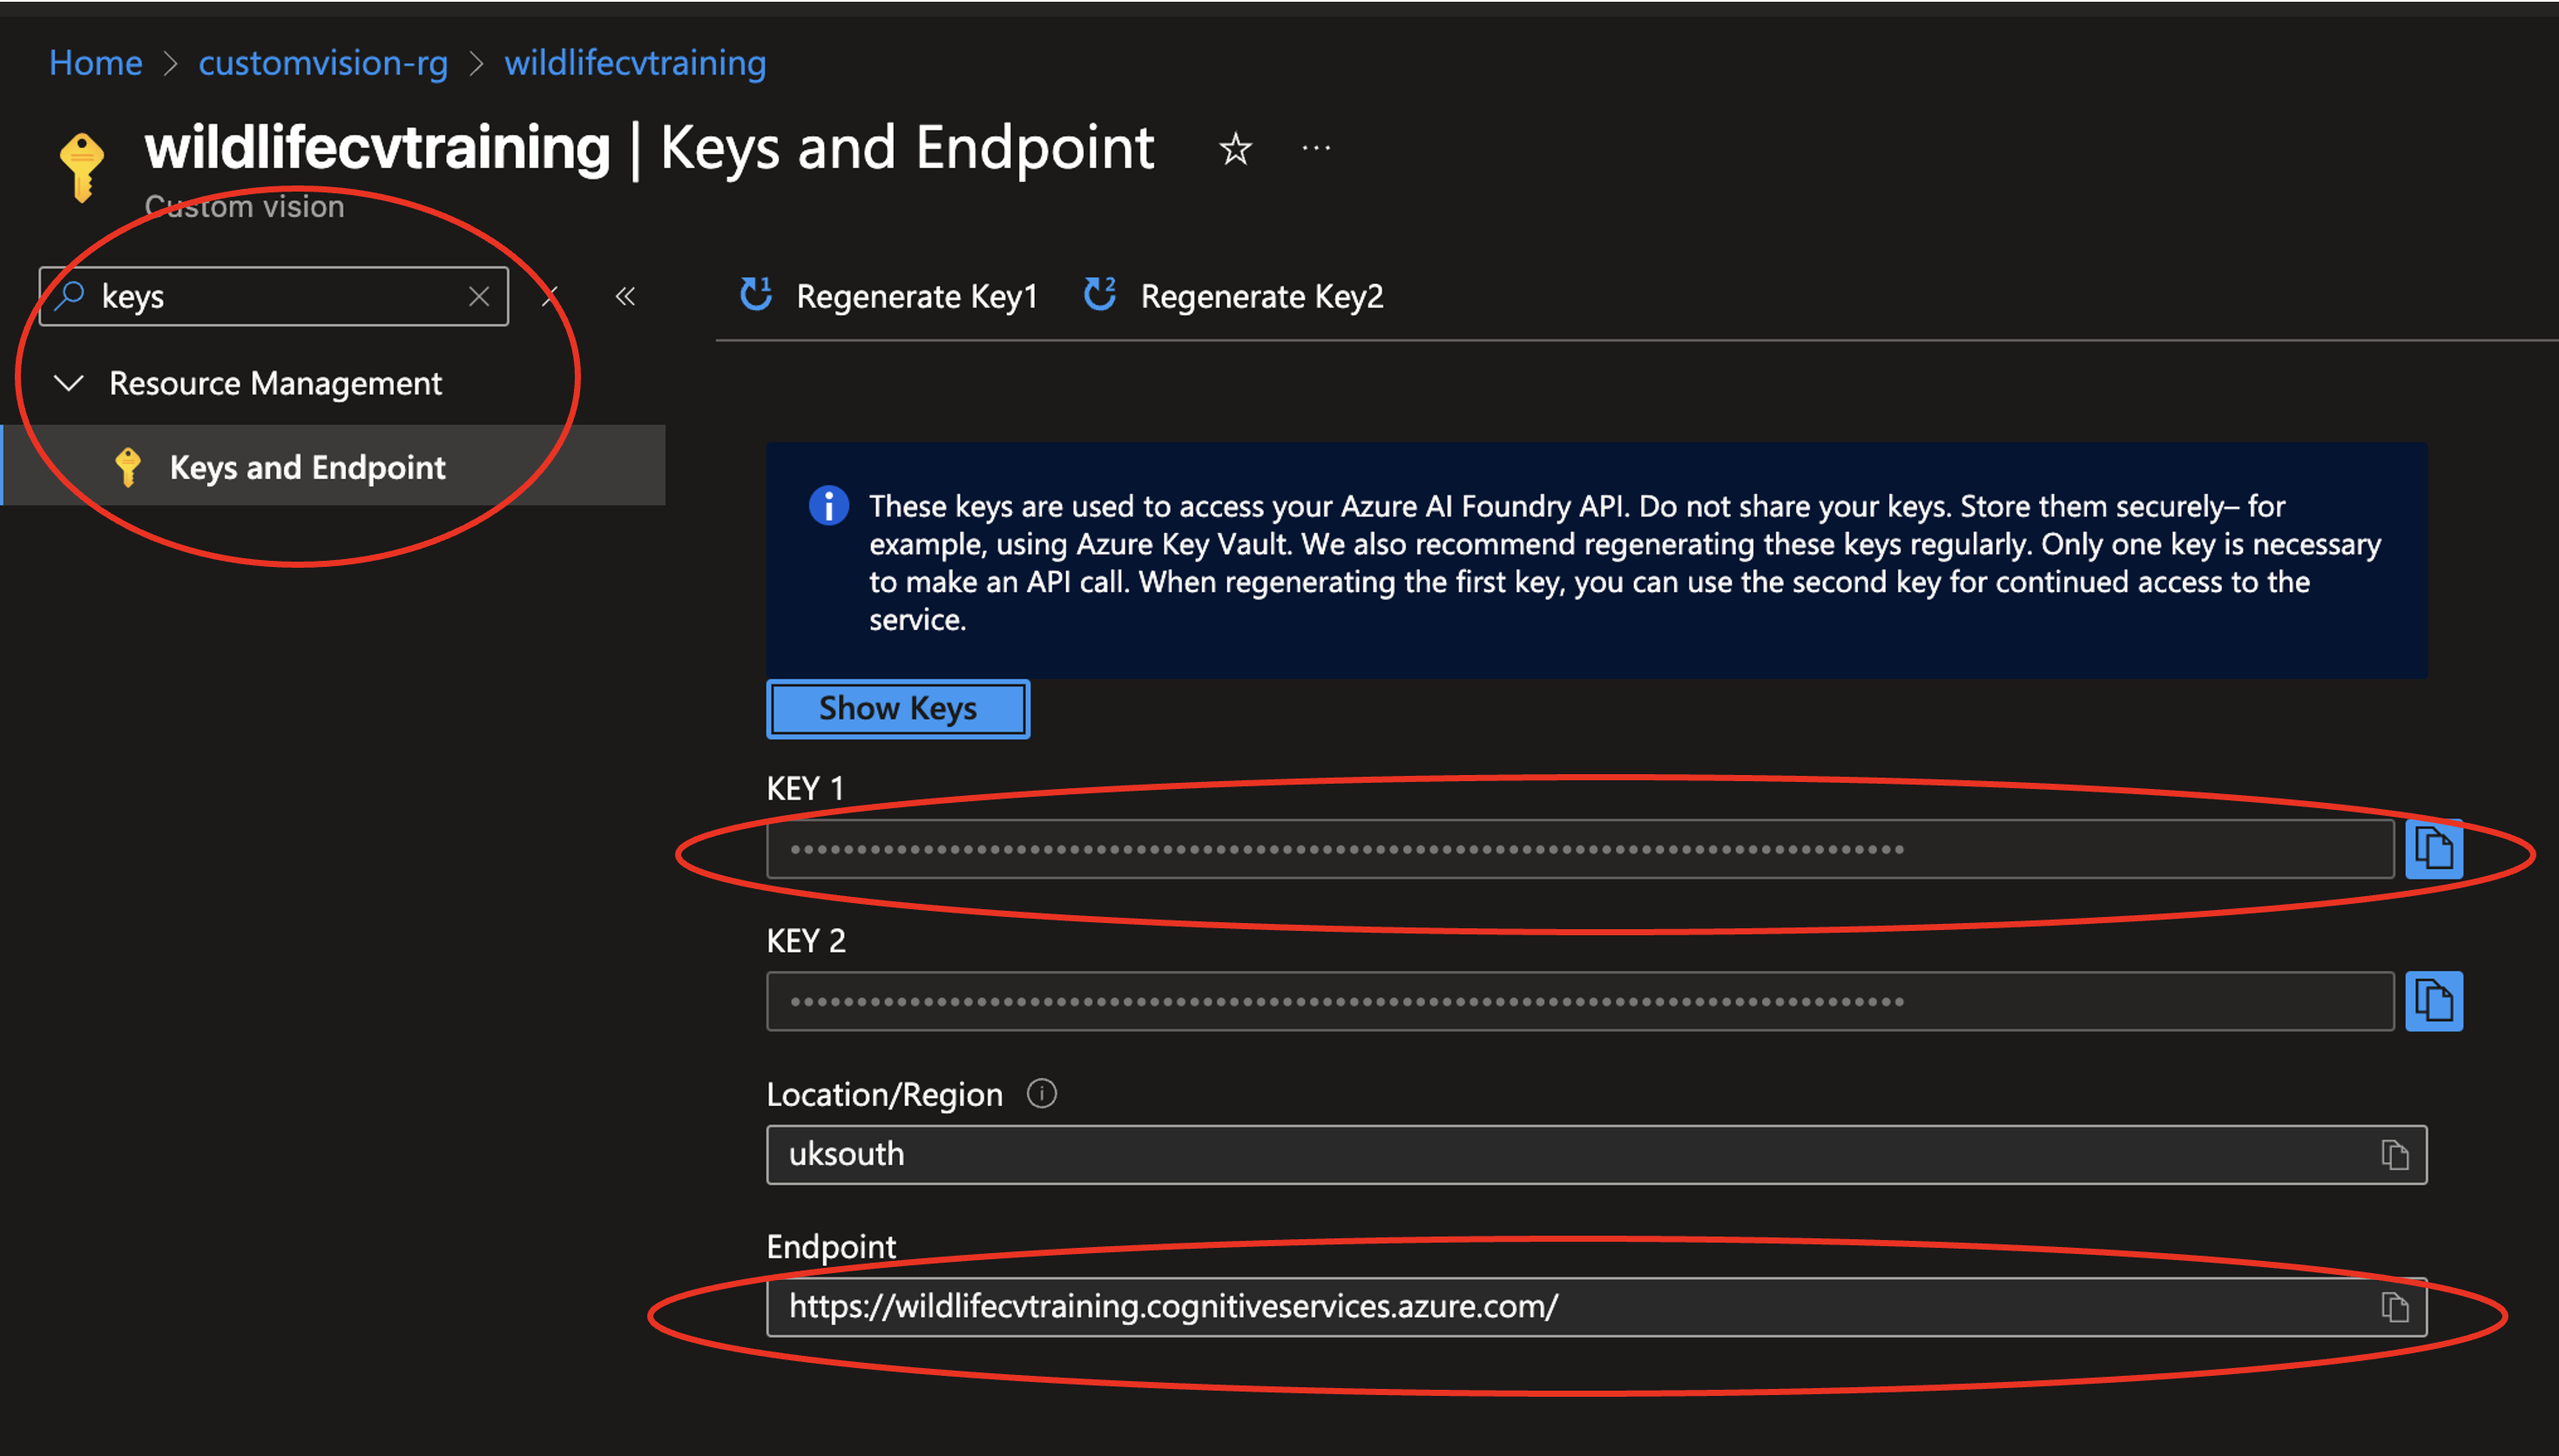
Search for and select Keys and Endpoint from the leftmost pane of the window.

Copy: KEY 1 and ENDPOINT to your clipboard, and onto a notepad.

Custom Vision training resource showing keys and endpoint

Custom Vision training resource showing keys and endpoint information

Navigate to your prediction instance by clicking the resource name (to the right of Home) in the filepath displayed at the top of the page. Your prediction instance will have the same name as your training instance, with the added suffix -Prediction.

Repeat the previous steps and note down your prediction key (KEY 1).

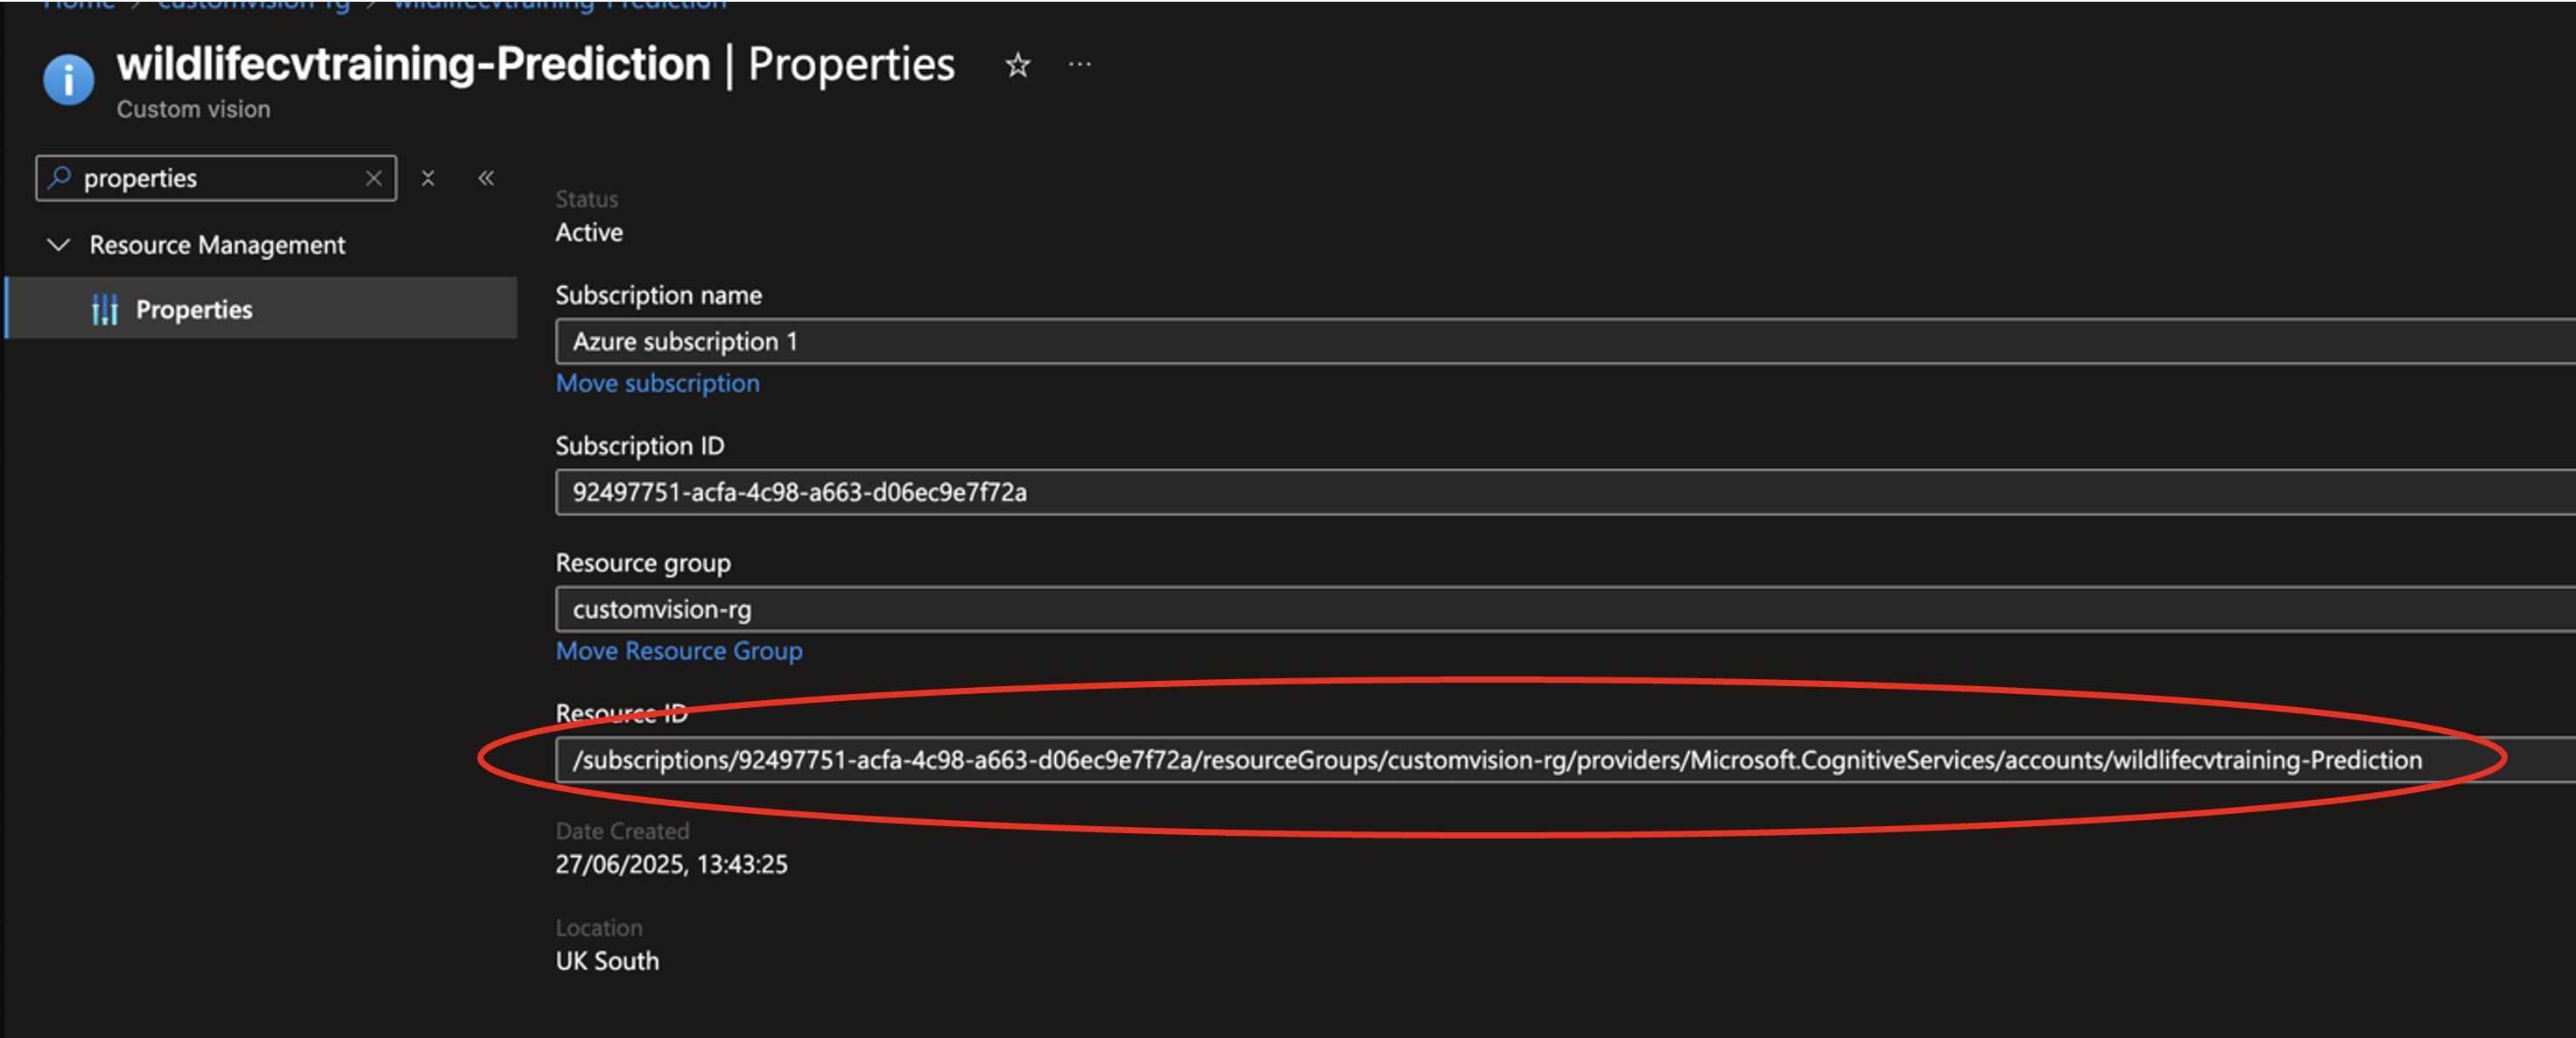
Stay on your prediction instance page, and in the leftmost panel, search for Properties, and select this. To your notepad, copy your Resource ID.

Custom Vision prediction resource properties showing Resource ID

Custom Vision prediction resource properties showing the Resource ID

You should now have copied two keys (one for training, and one for prediction instances), a training instance endpoint and your prediction resource ID onto your notepad.