When accessing the portal, you should see the overview portal below
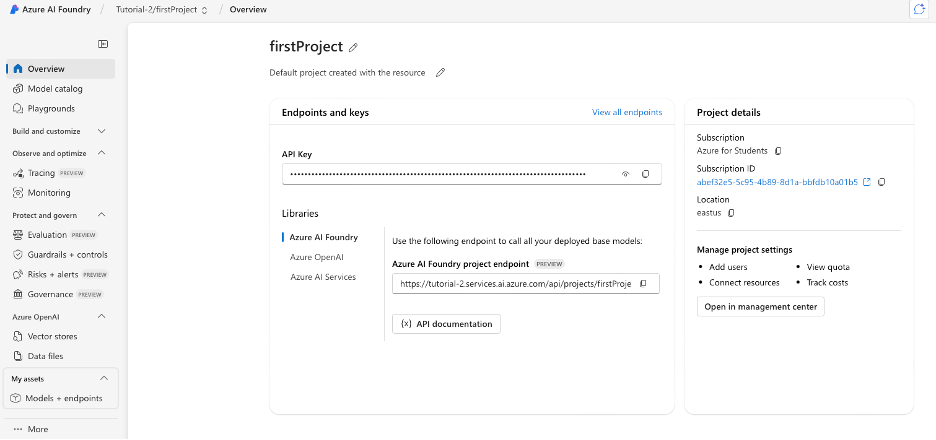
Azure AI Foundry portal overview showing the main interface
Video: Creating our first model
When accessing the portal, you should see the overview portal below
Azure AI Foundry portal overview showing the main interface
To deploy our first model, click ‘Model catalogue’ below overview on the left. After the click the section. You should be presented with an overview of all the models available as well as lists of all of the models which are the best in each category.
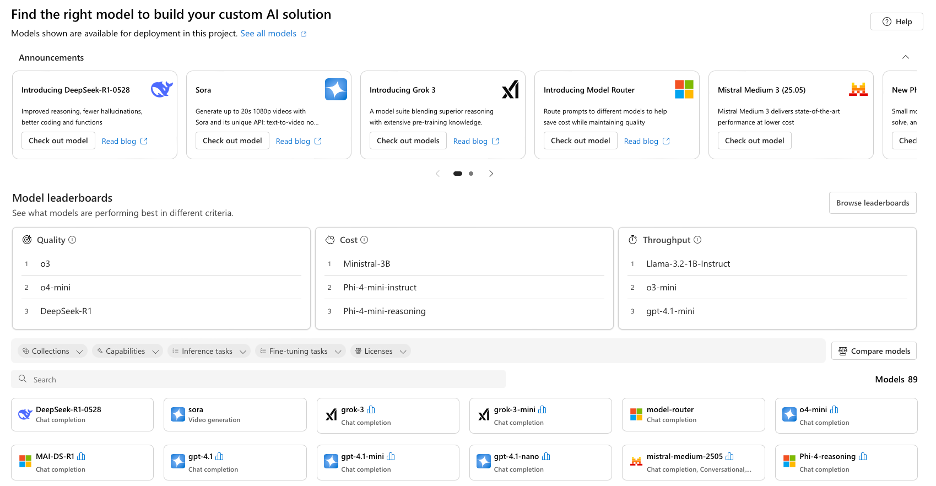
Model catalogue overview displaying available models and best-in-category lists
Using the search bar at the bottom, find the gpt-3.5-turbo. This is model is the main model we will be using within our methodology and can be used in the free academic subscription.
Once you select the model, you should get the page below. This presents you with the full descriptions of the model, along with the quality level and the pricing per number of tokens.
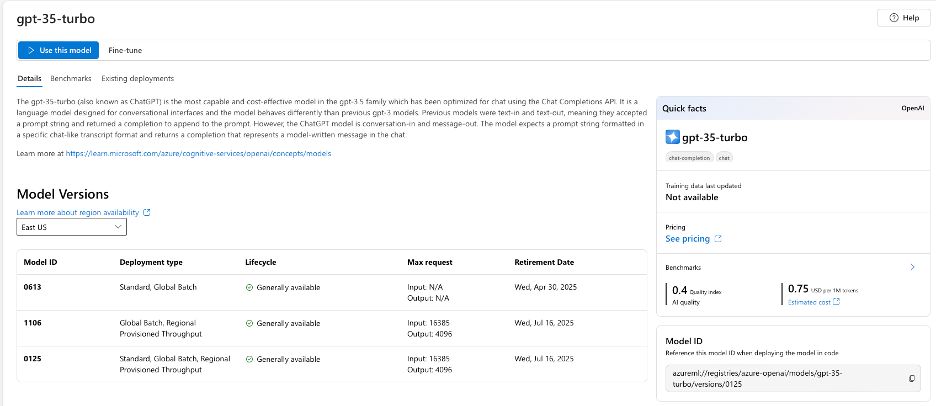
GPT-3.5-turbo model details including description, quality metrics, and token pricing
To deploy a version of gpt-3.5-turbo, click ‘use this model’.
When deploying a solution on Azure, there are 2 different ways of setting up your model, serverless API and Managed compute. What’s the difference? There a 3 main difference, model selection, cost and most importantly security.
Serverless API deployments function similarly to way you would communicate with chat GPT. Azure hosts a subset of the available models, normally the ones in common use across the industry and offers each separate ‘model as a service (MaaS)’. Your deployments then send a request to each model inside your azure environment. This method is low cost, and secure by default, as azure make sure none of your data goes to the model provider. The limitation of this model is that Azure may only have ~100 models available. This method is cheaper however as you are only billed per set of words (tokens) that you send the model.
The managed compute method takes a different approach that can be more costly, however far more customisable. In the managed compute method, Azure will create a custom virtual machine to host your model specifically. This can be more expensive as you are billed on the size and specs of the virtual machine and how long it is going to run for. The important part of managed compute is that the responsibility of managing data protection and security is on you, not azure. If you are planning on setting up a managed compute model, make sure you consult your organisations IT team about your data protection requirements and how to protect your data. If you are concerned or still unsure about this solution for your project, you may be able to contact the azure/Microsoft team directly through your organisation.
A pop-up should be deployed. To see the extended version, click the customise button in the ‘Deployment details’.
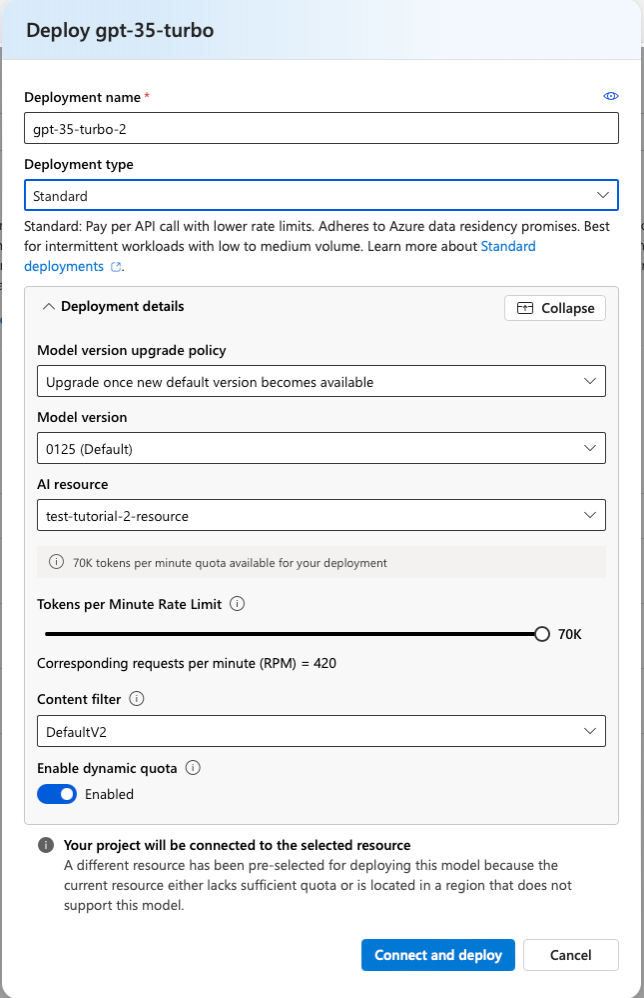
GPT-3.5 deployment configuration with customization options
This is where we can configure our AI model agent and how it functions. There are 2 key setting on this page that you need to look out for. The deployment type and the Tokens per minute / Enqueued token limit.
Although you shouldn’t be able to do so on a free or student account, it is imperative that you DO NOT deploy any models as ‘provisioned’ deployments. These are extremely expensive deployments meant for very large models with a very large consistent user base.
The deployment type defines the ways the model is hosted, fed data, and accessed by other front-end applications. We will have a more in-depth section discussing this in a future section. For now, we will select the standard deployment method.
Tokens per minute describes how many processable chunks of text can be given to the model in each minute. This ultimately the throughput of the model. As well as allowing the model to interpret more complex prompts and documents, it also defines the maximum compute resources the model will use. If a prompt is too long or a document sent to the model goes over the limit. Azure will terminate the request.
For our first model will set the token per minute limit to 10K. Once you have set this, click deploy. Once you’ve deployed the model, click ‘Models + endpoints’ under the ‘My assets’ dropdown tab.
My assets menu with Models + endpoints selection
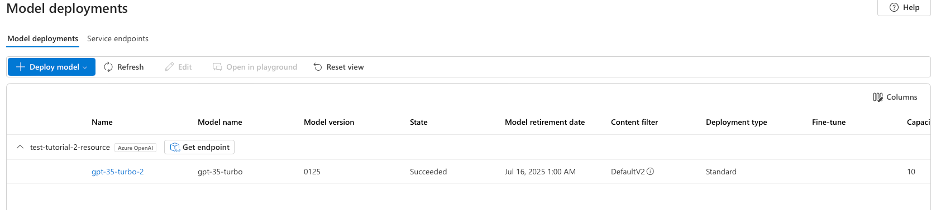
You should see your new model listed. If we click the model name we can open up the details of our model.
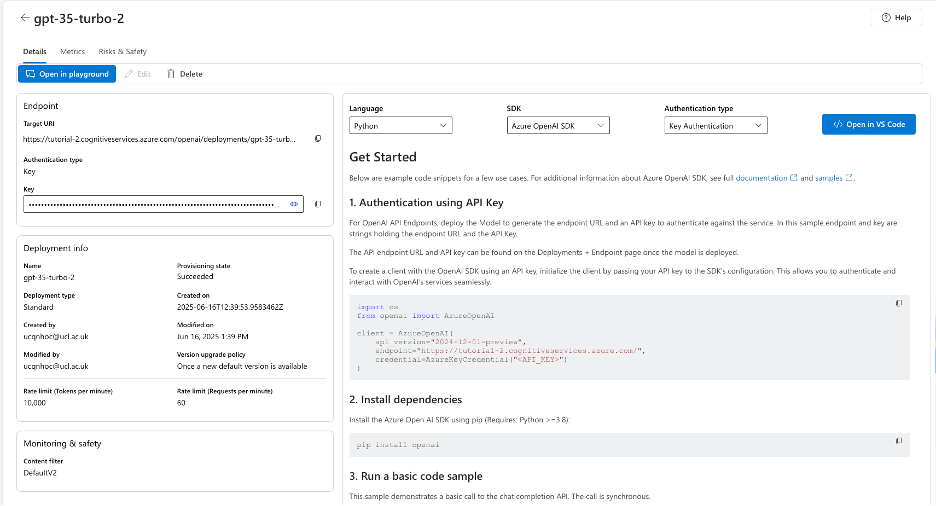
Deployed model details with configuration information and playground access
To try talking to our model, click on ‘Open in playground’.
We can now use this interface to send our model a prompt.
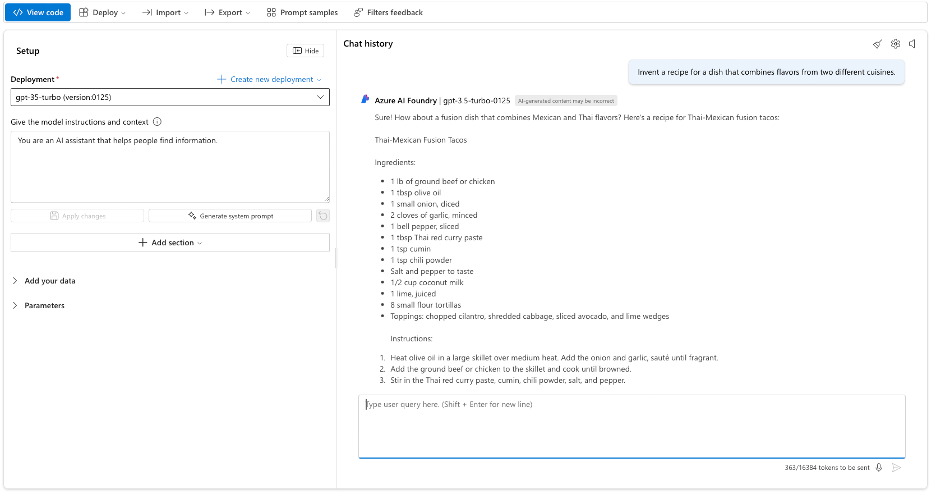
Model playground interface for testing and interacting with the deployed AI model