Follow the steps below to create your ML Studio resource.
Prerequisites
Before you begin, ensure you have:
- An active Microsoft Azure subscription
- Appropriate permissions to create resources in your Azure subscription
Step 1: Navigate to Azure Machine Learning
Begin by accessing the Microsoft Azure main platform. In the search bar at the top of the Azure portal, type "machine learning" and select "Azure Machine Learning" from the Services section in the search results.
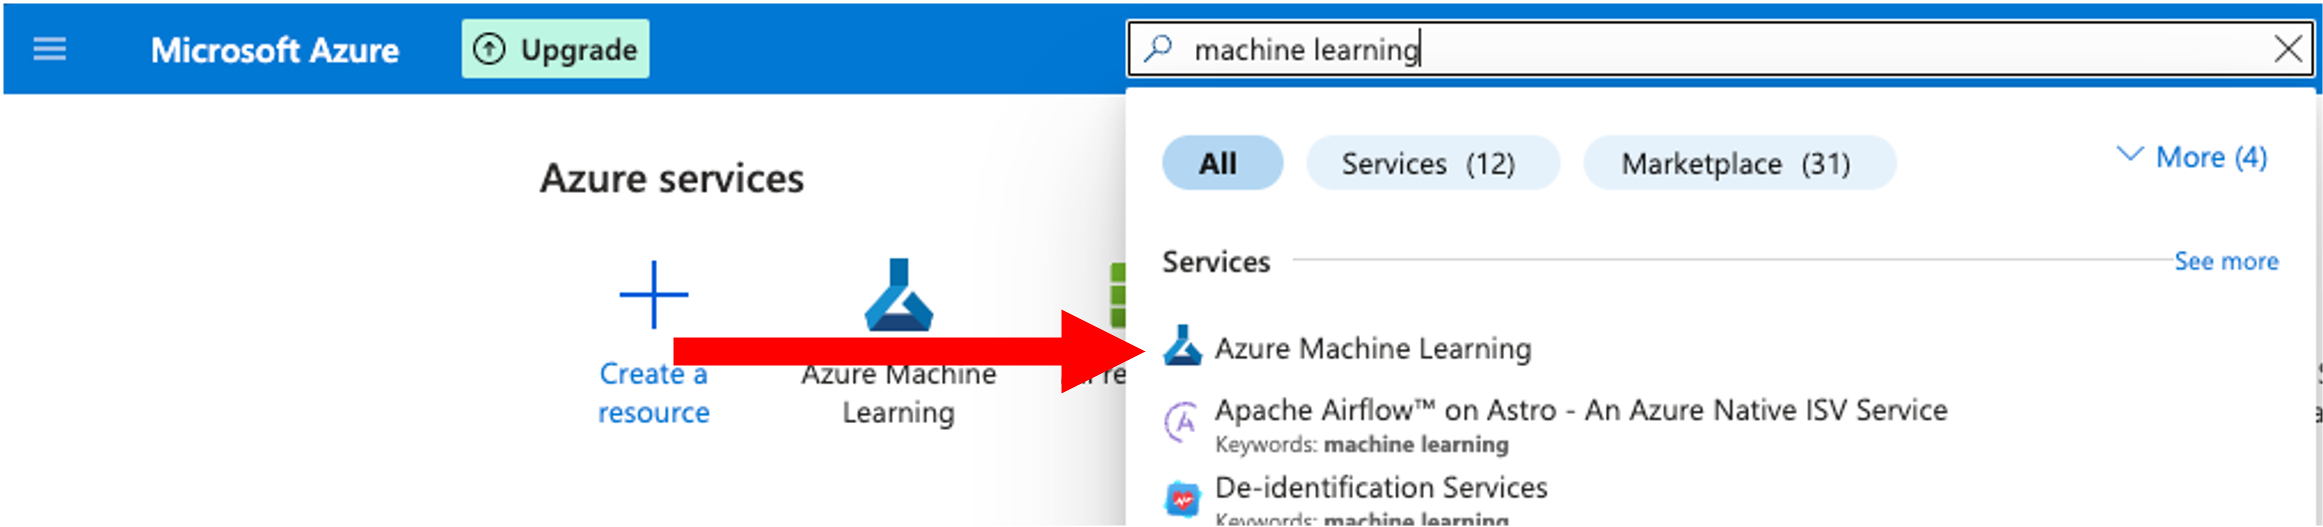
Searching for Azure Machine Learning in the Azure portal
Step 2: Create a New Workspace
Once you're in the Azure Machine Learning service page, locate and click the "+ Create" button. From the dropdown menu that appears, select "New workspace" to begin the workspace creation process.
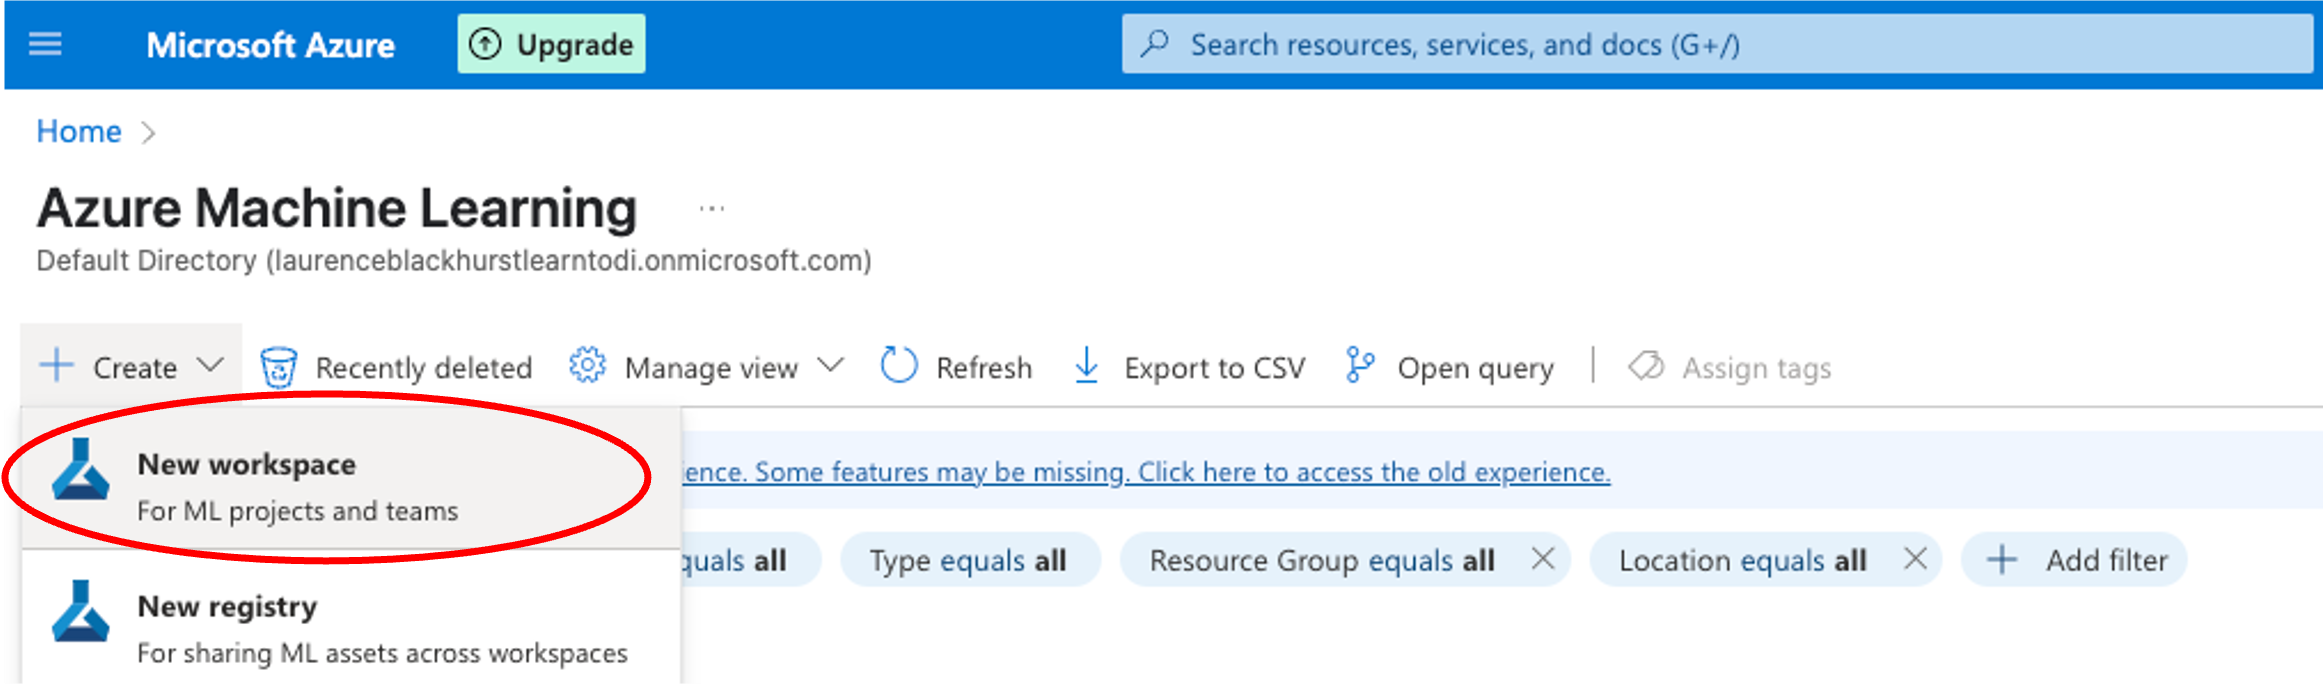
Creating a new workspace from the Azure ML service page
Step 3: Configure Your Workspace
You'll now be presented with the workspace creation form. Complete the following configuration:
Basic Settings:
- Subscription: Select your Azure subscription
- Resource Group: Create a new resource group or select an existing one in your preferred region
- Workspace Name: Choose a descriptive name for your ML workspace
- Region: Select your preferred Azure region (choose one close to your location for optimal performance)
Associated Resources:
For the following resources, click "Create new" to ensure your notebooks and data are stored separately from any previous resources:
- Storage Account: This will store your datasets, models, and experiment outputs
- Key Vault: Securely manages secrets, keys, and certificates
- Application Insights: Provides monitoring and logging capabilities
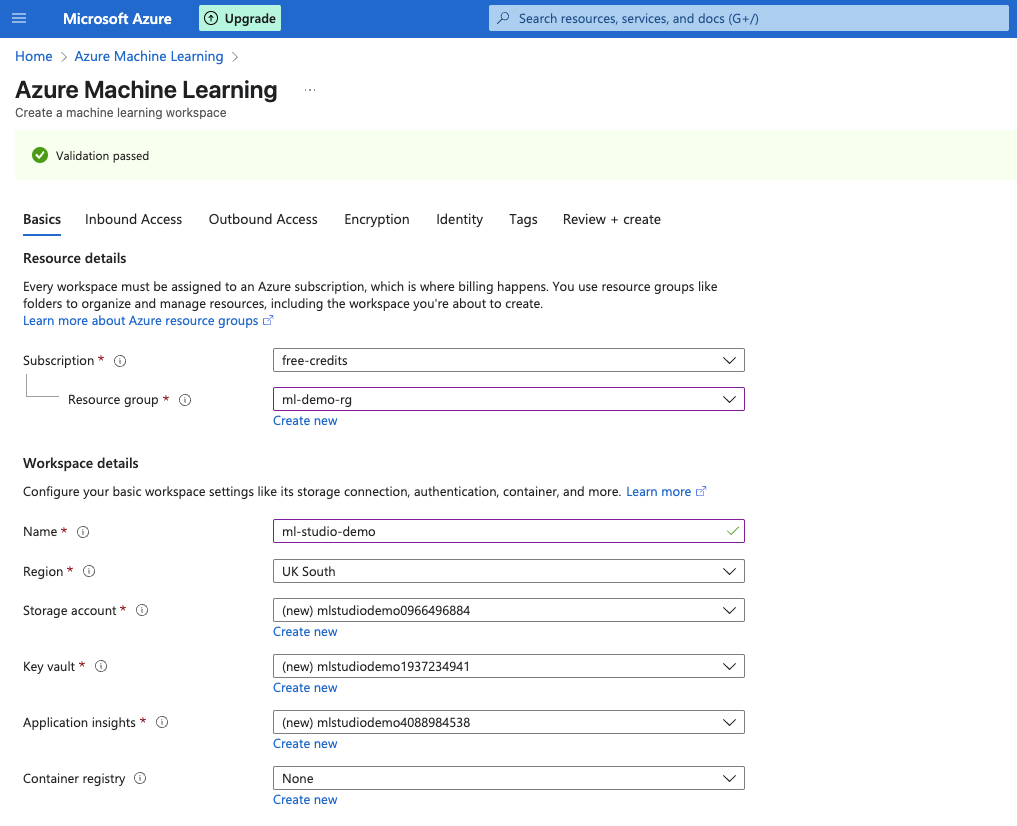
Configuring your workspace
Note: You don't need to modify any settings in the subsequent configuration tabs (Networking, Advanced, Tags, etc.) unless you have specific organisational requirements.
Step 4: Deploy and Launch
After reviewing your configuration settings, click "Review + Create" and then "Create" to deploy your workspace. The deployment process typically takes 2-3 minutes.
Once the deployment is complete, you'll see a confirmation message. Click "Go to resource" to access your new workspace, then click "Launch studio" to open the Azure Machine Learning Studio interface.
Launching the ML Studio from your deployed workspace
Next we'll run through a quick tour of the platform